How to Apply Makeup
Before You Begin The Makeup
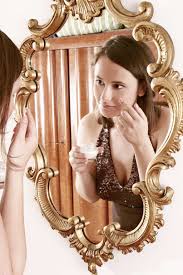
1.Determine what type of skin you have:
oily, combination, perfectly moisturized, dry, etc. Many cosmetic
counters have someone there that can do a preliminary analysis of your
skin and recommend some products. If you are on a budget, see what the professional at the cosmetic counter recommends, then go to your local and find a similar product for way less money.
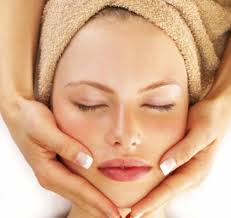
Apply Face Makeup

Start with a freshly-washed face, (and hands, too). Get a facial, or do one yourself. You want your face to be a clear and smooth canvas for you, the "artist," to do your art. Use a good deep-cleansing mask. Do not exfoliate if you have oily
or sensitive skin. It will spread bacteria around your face from the
already existing blemishes. Use antibacterial soap if you have acne. Also be sure that you replace the towel you use to dry your face every week. Lastly, apply toner
by taking a cotton pad that has been dampened in warm water and sweep
it over your face. Toner will restore the pH level of your skin and pick
up any remaining dirt. Make sure you look pretty. Try thinking of a
good cleanser that you can use. Then apply toner, and moisturizer.
Massage a light moisturizer into your face no matter what skin type you have. Always
avoiding the eye area. You could also apply your moisturizer with your
foundation brush or sponge if you have one. This will help oily skin
dry, and dry skin become smoother. Wait a few minutes for it to soak
into your skin.
Apply a foundation primer before you apply any foundation or tinted moisturizer. The foundation primer will smooth out the skin surface, make applying foundation easier, and make your makeup last longer.
Apply a sheer foundation that matches your skin tone.
Tip: If a liquid foundation has SPF in it, it's NOT good for taking
flash photography. Use the ones without SPF instead if you don't want to
look too flashed out on your face.
Wear illuminator to make your skin appear youthful and dewy compared with dull, matte makeup.
Skin illuminator's come in powder, cream, mousse, etc. L'Oréal®,
Revlon®, Neutrogena®, and other brands make them - it's like make up
with tiny particles that reflect light.
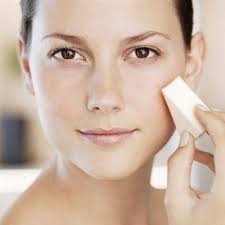
- Use a makeup sponge or wedge, starting around the hairline and
working your way down. (Use the wedge for this routine because you can
be more precise about where the make up goes.) If you want a proper look
that looks as if it has been done by a professional makeup artist, try
using a foundation brush.
- Remember to apply the makeup all the way down to your throat area
and keep blending so you can't see where the make up ends. Nothing is
worse than looking like you have a mask on your face.
- Around the eye area, do very light strokes inward, toward the inner
corner of your eye. Don't apply it to your upper eyelid. All of the
professional makeup artists say not to apply foundation to this area.
This is why you need a foundation that matches your skin. If you want
foundation to darken your skin then try putting it above your eyes, and
see what you like. Be gentle with this part, because the skin is very
delicate and sensitive here.
Apply concealer to any red or discolored spots.
In the corners of your eyes, where it's red, around the nostrils, and
under the eyes (to make you look more awake) are good places for this.
Do this after applying foundation, so you don't use too much. First
apply the concealer, then pat very lightly with your finger to blend.
Only apply concealer to the area that you want to conceal. Afterward,
use the wedge to blend the concealer in with the foundation. Stand back
away from your mirror to see if you have effectively concealed the
areas. Try to stand about the distance away from the mirror that you
stand away from people when you talk to them. Another way to conceal blemishes is to pat green concealer on the blemishes and red spots, then put foundation over top (the green reduces redness).

Apply a loose powder all over the face using a powder brush.
Pat it into the powder; then, with a paper towel, tap the brush so the
excess falls off the brush. Lightly brush across the whole face. Use a
powder puff (small) to apply powder on the upper lid. Apply a bronzer to your forehead, cheeks, and chin, to give a sun-kissed look,if wanted.
Highlight your brow bone, cheek bones, and cupid's bow by
applying a light powder just below the brow, and to the highest part of
your cheek.
 Apply a small amount of blush to the apples of your cheeks
. Smile
so you can see the apple of your cheek. Start the application at the
apple and drag the blush outward toward your temple, following your
cheek bone. Blend the color down a bit below your cheekbone in towards
your earlobe.
If you added too much color to the brush, use the clear side of your
wedge to blend it in more until the color is faded out a bit. Your
cheeks should have a hint of color. You don't want to look like a clown.
Contour your face, especially if you have "hidden" cheekbones.
To do so you will need a light tone of powder, don't make it ultra
white, but a soymilky kind of color. Apply a it on the brush and apply
it under your cheek bones, starting from the temple and going down until
underneath the apple of your cheek. Don't make it too obvious as it's
meant to look like a shadow. Then, on top of your cheek bones take a
white or really light skin tone powder and apply it, right between your
eye and your cheek bone, again until the temple, and voila. You have
cheek bones.
Take a fluffy powder brush and blend everything together, so that there are no visible lines or excess powders.
Apply Eye Makeup
Line your eyes.
Line it with a brown or soft black liner. For a more appealing look,
apply liner with very light strokes to the upper lid, stroking toward
the outer corner of the eye. To blend, use an angle brush. For a more
natural look, dip the angle brush in some of your darker eyeshadow. Use a
very light amount, or use the applicator tip. For the bottom lid, use a
very light amount on the outer corner.
Put on the eyeshadow.
Most eye colors come with two or three colors on the palette. The
lighter color is for the lid. The darker color is for the crease on the
lid, just below the eye bone. Apply the lighter tone first to the lid,
spreading upwards to near the crease. For this, use the applicator that
came inside the package. For the darker color, using your eyeshadow
brush, dip into eye color and tap the brush to lose the excess. Apply
inside the crease of the eye. You can find the crease by looking
straight ahead. Your eye makes its own crease. Blend the color toward
the outer corner of your eye. Sometimes you can blend it around to the
bottom lid, but very lightly. The lightest color is for under the brow
bone. Use the applicator to apply right on the brow bone just under the
brow line. Make sure to use the larger eyeshadow brush to blend all the
colors.
Use eyebrow pencil color that is very close to your natural eyebrow color.
Here you just want to fill in missing areas. (It might behoove you to
visit a makeup person that can arch your eyebrows correctly. If you've
never done it yourself, have someone do it for you.) Your eyebrow should
look very natural. If you do apply eyebrow pencil to any part of your
eyebrow, use the angled brush to blend it into your brow with very light
strokes.

Use a lash curler before applying any mascara. There are several mascaras to choose from depending on the look you want. If you have short lashes,
use a mascara that will add length; if you have thin lashes, use a
volumizing mascara. Never pump your mascara brush in and out of the
mascara. This causes air pockets. Dip the brush in the mascara once and
lightly wipe off the excess onto a paper towel. Looking downward, apply
to the top lash with upward strokes. Start with the inner part and work
your way outward. Do both eyes with two coats, then let dry. After a few
seconds, do the bottom lids. It's better to apply to the very outer
part of the lash on the bottom lid. This will open your eye more. An
inexpensive way to curl your eye lashes is to take the brush from an
older mascara, and use it, after you've washed most of the mascara off.

Apply Lipstick
Apply lip balm, primer, or sealer. This will help make all lip products applied last longer and much more vibrant.
Line your lips with a liner that matches your lip color.
Make sure your lip liner pencil is sharpened, but not too sharp. Line
around the natural line of your lips. Trying to create a fuller lip by
dragging the lip pencil outside your lip line is for professionals.
Usually it makes you look like you're just plain bad at applying makeup.
After applying your lip pencil to your lip line, rub your lips together
so the lip pencil color spreads inside your lips.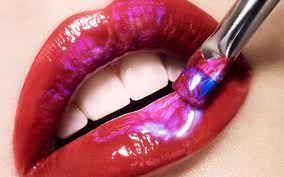
Apply lipstick or lip gloss with a brush.
It will spread it evenly. It's a good idea to brush your lip brush in
your lipstick, then some of your lip gloss for a nice light shine. Blot
your freshly painted lips lightly with a tissue. This will make it last
longer.
 Use a pressed powder to lightly powder the rest of your face, and the area under your eyes
. Use very light pressure. Keep your pressed powder in your purse for touch ups.
